llemarie’s weblog

Programming, tinkering – Lionel Lemarié

Archive for the ‘Blogroll’ Category

Projects: ASCII keyboard emulator for Apple I Replica

Posted by llemarie on February 20, 2010

ArduinoASCII keyboard emulator

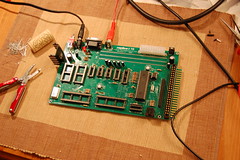
Last week I built an Apple I Replica from a Briel Computers kit. While I loved the completed machine, I suffered a bit from the fact that backspace doesn’t work (you have to type the assembly *exactly* correct), and of course it loses the RAM contents when shut down.

I wanted to make an interface to the PC so I could use a modern editor and simply copy-paste to the Apple I. As a quick and dirty solution to the problem, I used an Arduino, wired it to the ASCII keyboard port of the Apple I and wrote a small sketch that listens on the serial port and sets the data pins accordingly.

Photos on Flickr.

Here’s the Arduino sketch, real simple:

/*
   ASCII keyboard
   Lionel Lemarie
   2010-02

   Listens on the serial port for characters from a PC.
   Outputs the codes like an ASCII keyboard.
   Compatible with Apple I Replica.
 */

// The order of the pins is chosen for minimal wire crossing
// when connected to an ASCII keyboard socket.
int ASCII0 = 7;
int ASCII1 = 8;
int ASCII2 = 3;
int ASCII3 = 5;
int ASCII4 = 4;
int ASCII5 = 6;
int ASCII6 = 2;
int STROBE = 10;
int NRESET = 9; //reset active low

// LED will blink when a character is emitted
int LED = 13;
unsigned long previousMillis = 0;
unsigned long interval = 200;

void setup()
{
	analogReference(EXTERNAL); // Is this needed? 

	// Initialize the digital pins as output
	pinMode(ASCII0, OUTPUT);    
	pinMode(ASCII1, OUTPUT);    
	pinMode(ASCII2, OUTPUT);    
	pinMode(ASCII3, OUTPUT);    
	pinMode(ASCII4, OUTPUT);    
	pinMode(ASCII5, OUTPUT);    
	pinMode(ASCII6, OUTPUT);    
	pinMode(STROBE, OUTPUT);    
	pinMode(NRESET, OUTPUT);    

	pinMode(LED, OUTPUT);

	digitalWrite(STROBE, LOW);   // set the STROBE pin to inactive
	digitalWrite(NRESET, HIGH);  // set the RESET  pin to inactive

	Serial.begin(9600);
}

void loop()                    
{
	unsigned long currentMillis = millis();

	if (Serial.available() > 0)
	{
		int iInput = Serial.read();
		iInput &= 127;

		if (iInput)
		{
			if (iInput>='a' && iInput<='z')
				iInput = iInput - 'a' + 'A';

			int D6 = LOW;
			int D5 = LOW;
			int D4 = LOW;
			int D3 = LOW;
			int D2 = LOW;
			int D1 = LOW;
			int D0 = LOW;

			if ( iInput & 64 ) D6 = HIGH;
			if ( iInput & 32 ) D5 = HIGH;
			if ( iInput & 16 ) D4 = HIGH;
			if ( iInput &  8 ) D3 = HIGH;
			if ( iInput &  4 ) D2 = HIGH;
			if ( iInput &  2 ) D1 = HIGH;
			if ( iInput &  1 ) D0 = HIGH;

			digitalWrite(LED, HIGH);
			previousMillis = currentMillis;

			// Output an A (100 0001)
			digitalWrite(ASCII6, D6);
			digitalWrite(ASCII5, D5);
			digitalWrite(ASCII4, D4);
			digitalWrite(ASCII3, D3);
			digitalWrite(ASCII2, D2);
			digitalWrite(ASCII1, D1);
			digitalWrite(ASCII0, D0);
			digitalWrite(STROBE, HIGH);
			delay(40);  // strobe for 40ms
			digitalWrite(STROBE, LOW); 
		}
	}

	if ( (previousMillis>0) && (currentMillis-previousMillis>interval) )
	{
		digitalWrite(LED, LOW);
		previousMillis = 0;
	}
}
Posted in Apple I Replica, Arduino, Blogroll, Programming, Projects | 3 Comments »

Projects: Apple I Replica

Posted by llemarie on February 14, 2010

Apple I Replica

So last august I came across and bought an Apple I Replica kit, from Briel Computers. It’s a very cool little kit which includes a smallish PCB, a handful of components, all the ICs required (including the 6502 microprocessor and a Parallax microcontroller) and very easy instructions. The EEPROM has BASIC and an Assembler already in, so once you assemble the whole thing it’s ready to use. The schematics and manuals are included on a CD, although the package on the website is slightly more recent.

I had a couple of mishaps (dry solder joints, couldn’t find a suitable power supply, plugged in the ROM in the wrong slot). But nothing that destroyed the board, which is a bonus.

See all the steps in pictures in the Flickr set.

Next: make a hardware interface to connect a PC to the ASCII keyboard socket. I want to be able to type on the PC and send the keystrokes to the board, as if it was receiving it from a keyboard. The point being that I would type the programs in vi or notepad and “copy/paste” the code to the Apple I Replica. I plan to use an Atmel microcontroller to listen to the PC on USB or serial and simulate the keystroke for the ASCII keyboard port. Details on the (proper) ASCII keyboard can be found here.

Posted in Apple I Replica, Blogroll, Projects | Leave a Comment »

Tip: Connect to your iPhone using VNC and SSH

Posted by llemarie on September 5, 2009

VNC connection to iPhone

VNC connection to iPhone

After a short hiatus I thought I’d post something short and sweet to ease back into it.

There’s been quite a bit of news of people getting the location of their stolen iPhones via MobileMe. It’s also nice for your own peace of mind to be able to tell the phone to wipe itself so all your precious data doesn’t fall into thieving hands.

MobileMe is $99 a year though. Count me out.

Now I’ve previously talked about how to setup a tunnel to connect to a remote PC securely via Remote Desktop. In the same way it’s possible to connect to your iPhone securely, and, more importantly, wherever it has data access!

Here’s how to setup a persistent SSH tunnel from the iPhone to your home server that gives you SSH and VNC access to the phone.

You need:

– A home SSH server visible from the outside. If you want your phone to phone home, you need something to pick up.

– A jailbroken iPhone. If you don’t want to jailbreak it, there’s always MobileMe.

OpenSSH for iPhone. Install it via Cydia. Make sure you change the default passwd for both ‘root’ and ‘mobile’ users.

VNC server for iPhone. It’s called Veency, install it via Cydia. Go to the Settings and set a connection password.

Autossh. Install it via Cydia.

That’s it, now you just need a script to start the tunnel, another script to start the first script at load time, to register your phone ssh key on your home server and we’re done here.

The tunnel script, via the Terminal or a SFTP application (I recommend the free FileZilla), write it as /bin/autohome.sh:

#!/bin/sh
export HOME=/var/root
export AUTOSSH_GATETIME=0
autossh -M 20000 -f -2 -N -C -R *:50022:localhost:22 -R *:5901:localhost:5900 USERNAME@HOME

Set the permissions to 755 (chmod 755 /bin/autohome.sh, that’s read/write/execute as root, read/execute for others).

Easy enough. Set your USERNAME and HOME address to your public home SSH server. The only gotcha is the gatetime setting, it must be set to 0 to allow the connection to start at boot time: it will very likely fail a few times until the iPhone finds a data connection (3G or Wifi), but you want autossh to retry until it connects, which is not the default behaviour. Make sure that the file has the Linux end of lines.

The boot script, write it as /System/Library/LaunchDaemons/com.autohome.startup.plist:

<?xml version=”1.0″ encoding=”UTF-8″?>
<!DOCTYPE plist PUBLIC “-//Apple Computer//DTD PLIST 1.0//EN” “http://www.apple.com/DTDs/PropertyList-1.0.dtd”&gt;
<plist version=”1.0″>
<dict>
<key>Label</key>
<string>com.autohome.startup</string>
<key>Program</key>
<string>/bin/autohome.sh</string>
<key>RunAtLoad</key>
<true/>
</dict>
</plist>

Set the permissions to 644 (read/write as root, read only for others).

Now you need to be able to login to your home server from the phone without typing your password. You also don’t want to compromise the security of your home machine, if it can be avoided. For that, you can add a new user specifically for the phone (for instance ‘mobilemoi’), set its login shell to /bin/false (using the chsh command) and remove its password from the /etc/passwd file. Give this user access to nothing. Don’t forget to use this user in the tunnel script.

Login onto the iPhone via SSH as root (using putty.exe for example), run ssh-keygen using the default settings. We’ll need the public key that was just created, so cat ~/.ssh/id_rsa.pub and copy the string in the clipboard.

Login onto the home server as root, go in the ‘mobilemoi’ directory, create a .ssh directory, in there create a file called authorized_keys and paste the public key in there. From the mobilemoi directory, run chown -R mobilemoi.mobilemoi .ssh to set the right permissions.

Test it. On the phone, as root, run autohome.sh. On the home server, run netstat -a. After a short while, you should see the phone’s connections, lines like these:

tcp        0      0 Unknown-xxxx:ssh        xxxx:62595              ESTABLISHED
tcp6       0      0 [::]:20000              [::]:*                  LISTEN
tcp6       0      0 [::]:50022              [::]:*                  LISTEN
tcp6       0      0 [::]:5901               [::]:*                  LISTEN

If the connections look like “localhost:5901” instead of “*:5901” or “[::]:5901” then that’s a problem in the sshd config file. Edit /etc/ssh/sshd_config and add “GatewayPorts yes”. Restart the ssh server.

Now to connect to the iPhone and control it from any PC, install VNC, start the viewer, connect to the VNC server using your home SSH server address (likely on the internal IP) on port 1.

For example:

VNC Viewer settings

VNC Viewer settings

You can also use an SSH client to connect to the iPhone via the tunnel. Point the client to your home server (again the internal IP), on port 50022.

Right. Reboot your iPhone, make sure that the tunnels are created. You’re done.

Now every time you boot your iPhone, a tunnel is created to your home server. This gives you the IP of the phone (via the server logs), SSH access to the phone and VNC control of the phone. The possibilities are limitless!

WARNING:

As of the time of writing, I have not fully verified the drain on the battery that results from the permanent connection. I believe that it should be minimal, but it has yet to be observed. I will update the post with more information when I know for sure one way or the other. The connection parameters may need to be tweaked to minimise the impact on the battery life.

EDIT: After some experimentation, it appears that there is a toll on the battery life after all. I will continue to investigate.

Ideally the connection would start on demand. It would be nice to send a push message to the phone that would trigger the start of autossh. This would essentially be free (or no more costly than push notifications are) and offer the same functionality.

Thanks to Saurik for the most of the software needed for this feature.

Posted in Blogroll, iPhone, Remote Desktop, Tips | 28 Comments »

Tip: Updated: Use a higher resolution desktop than your monitor can support

Posted by llemarie on March 8, 2008

With the Asus Eee PC being so popular, there’s a lot of people looking to improve the real estate of their small computers. Here’s an update to my previous post to get fullscreen higher resolution on your monitor, be it small or big.

To make it clear: even though this technique uses Remote Desktop, it connects to the local machine only, there are no remote computers involved, no internet connections required.

There were a number of drawbacks with the technique described previously. The most annoying problems were:

  • the Remote Desktop window was not fullscreen, you could see the titlebar constantly,
  • the need for a port forwarder.

Enterprising users found solutions to both problems, so I think it’s time for an update!

1. How to allow multiple users to connect at once on Windows XP.

Get the Terminal Patch and install it. It’s really easy, just run the installer, there’s nothing to it. You need to reboot.

You can now login into your machine using multiple accounts at once, locally and using Remote Desktop.

2. Create a new user account and enable Fast User Switching

Add a new user whose sole purpose will be to Remote Desktop to localhost. Log-in as the new user for the remaining steps. No need to set the theme or anything.

To add a new user, open the Control Panel, open User Accounts, click “Create a new account”. Then enable Fast User Switching by clicking “Change the way users log on or off”.

3. Create a saved RDP session with scaled settings

Follow the instructions from here to create a .rdp file and add “smart sizing” to it.

Set the server to “127.0.0.2”. Note that normally the local computer is 127.0.0.1 but Remote Desktop will not let you connect to that address. Connecting to 127.0.0.2 works however, which is strange but convenient!

Set the username as your normal username, not the new one.

4. Make it fullscreen

Update: Paul in the comments mentioned that the CTRL-ALT-PAUSE/BREAK key combination makes the remote desktop window fullscreen. It works great! No need for additional software.

Download one of those applications (Desktop Enhancers) that make any window fullscreen. I use the shareware FullScreen 2.5, but if you find a good one as freeware please do post it in the comments. I might write one at some point if there’s a demand for it.


That’s it! When you want high-res, simply log-in with your new account, start the connection by double-clicking on the .rdp : you’re connected as your usual user, ctrl-right click on the title bar to go fullscreen and voila.

Posted in Blogroll, Remote Desktop, Tips | Tagged: , , | 5 Comments »

Project: Change Housing on Z610i

Posted by slemarie on March 2, 2008

phone(Posted by Sarah)

So, after inadvertently stealing Lionel’s thunder when he bluetoothed his headphones and the world gave me all the credit, I thought I better get a project on here to prove that I can totally do stuff too. And also because Lionel wrote on my (retired) blog one time, and I need to get revenge return the favour.

So here’s the first thing I did. Inspired by my husband’s penchant for doing so, I took something apart. But then in a ground breaking revelation, I put it back together again! And now with my super helpful flickr set to follow, you can too.

My unwitting victim was a Sony Ericsson Z610i. They are cellphones of the supershiny clamshell variety, google for ‘z610i’ and you will most likely hit 1001 forums with dudes talking about how they just bought one for their wife. Please understand that usually, I lust after a phone with some pointless great new feature that I will never use, but it will destroy my battery life (cf. wifi on my N80, which I have successfully used outside my own home approximately 0 times. But I still changed my cell phone number, just to get this phone). Anyhow this time around, I just wanted a straight up clamshell, that would not cost the earth, and maybe even look nice.

So I bought the most badly abused phone you have ever seen on eBay. If Bride of Chucky had a cellphone, this is what it would look like. It was cheap, OK?

I blame eBay for most of my failings in life, and this time was no different. If there weren’t a vast array of very accessible alternative phone housings on eBay, I’d never have found myself musing one day how fascinating it would be to take my cell phone to pieces, check out the guts, and then while I’m at it rebuild it back into a shiny new case. What fun! Two weeks and one package from Hong Kong later, my vision was realised and with no thought for the possible consequences whatsoever I set about taking my phone apart.

I learned several things while doing this project.

1. Don’t just look for screws. Look for screw covers. Under screw covers, ye will find more screws.
2. It’s really hard to take phones apart until all the screws are out.
3. Screws 1, plastic wedge tool 0.

If you’re patient enough to try this at home, check out the flickr set photo descriptions for some running commentary and obvious statements such as “take this out of the old housing and put it in the new housing, in the same place”.

Most steps are fairly straightforward. I began by removing the casing on the base half first to minimise the amount of time that I was waving around the naked LCD displays. This seemed to work as an approach. When you begin, prize apart the new casing your ordered first (WHY do they piece it together!?) and take your time. Prizing casings apart works best if you run slowly and gently around the entire casing seam in slow gentle movements. Thin cheap plastic bends if you so much as sigh in frustration near it, so take your time and never tug something too far in any one direction unless you’re totally confident about the consequences.

It’s hard to tell from the final finished photos, but I actually broke my new casing in two places while opening/fitting it. The upper half of the keypad housing is particularly vulnerable at each side, as you only have two thin struts of plastic there while you’re levering off the ends of the casing. One snapped almost instantly in the first 30 seconds of my phone destruction newbie-ism, one gave up during my base-half reopening session as I attempted to reunite the keypad with its underlay. Fortunately both breaks were clean and reseated into each other well once held in place by the rest of the housing.

On the second snap, that half of the casing was suddenly freed by both breaks and allowed me to sit the Franken-phone down with case components sticking out in all directions rather casually.

“I’m nearly done. Honest. Just a few bits to finish.”

All in all I spent about four hours messing with it, involving far too long believing I had removed all the screws, and far too long rebuilding the base without first putting in the keypad underlay. You really want the keypad underlay, it’s what makes your keys work, as it turns out.

Would I do it again? Actually, yes. Paying a small amount for a new housing of decent quality and then cleaning your phone out definitely beats carrying your phone around in some second skin housing that will never look as great as your phone does on its own. For the last 18 months I’ve carried an N80 in a crystal case covering, and while it has preserved the phone excellently, it’s been even bigger and fatter than all its phone peers for the duration. Naff.

Did it go totally smoothly? No. I snapped the casing – recoverable in my case, fortunately – and now the camera isn’t working. All other features work as advertised, but the camera does nothing. There’s a fairly large connector near the hinge that you can disconnect, and I did – I highly suspect this is the source of my problem. Sometime when I decide a camera on a cell phone beats a Nikon D40, I’ll get around to looking at that.

The Z610i is a strange beast. Its features are utterly average and yet for some reason I have an irrational love of it as a phone. And now that it’s a shiny as it was always meant to be, I am complete!

Tune in next week for ‘Changing the housing on your husband’s macbook’. Am I kidding? Am I?

Posted in Blogroll, Projects, Z610i | Tagged: | 8 Comments »

Project: Head-tracking on PS3 – Now without glasses

Posted by llemarie on February 28, 2008

Well, the R&D guys at SCEA went and did it. They’re using facial recognition to track on head on the screen, instead of using IR LEDs strapped to your head. They demonstrated it at GDC, cool stuff!

The feat was reported by Kotaku, Gizmodo, Joystiq and others, but essentially they all point to the same video on mtv.com which has a silly IP ban for UK, Japan and Canada. Those countries clearly have no right to know about glassless headtracking.

Same video on youtube with no IP ban:

Posted in Blogroll, Head Tracking, Projects | Tagged: , , | Leave a Comment »

Breakpoint ’08 Seminar: Multicore Mayhem

Posted by llemarie on February 27, 2008

The seminar page for Breakpoint ’08 is up!

I’ll be giving a talk at Breakpoint in Bingen on multicore programming on Windows. A lot of lessons can be learnt from console programming and applied to the PC now that CPUs have 2, 4 or 8 cores… I’ll be discussing design and pitfalls (with solutions) and I’ll give away an in-game profiler for free!

Stay tuned (to the RSS feed) for more details about the entry in the next few weeks.

Posted in Blogroll, Breakpoint, Programming, Teenage Mutant Ninja Puppets | 5 Comments »

Programming: ezTunnel SSH – Port Forwarding Made Easy

Posted by llemarie on November 25, 2007

Update: Windows and Linux binaries, as well as open-source code under GPL are available here.

The freeware “ezTunnel SSH” is a GUI application for Windows and Linux that makes it easy to manage multiple SSH tunnels in the background. The interface is simple: creating a tunnel takes a few seconds, connecting to an existing tunnel is instant!

“Why would I want to do that?” you might ask… To make a secure connection to your home or to your office of course! If you wanted to control your home computer via Remote Desktop from work for example, you certainly don’t want to open port 3389 on your home firewall! Instead you set-up an SSH server at home (with a Linux box, or using cygwin under Windows, it’s easy either way) then you “tunnel” your connection via the port 22 (default for SSH) and you don’t have to open any other ports on your firewall. With one SSH server on your home network, you can access any computer on your network simply by creating a tunnel to it.

Now imagine you want to securely control your home PC from anywhere in the world, stream your home MP3s (using Jinzora, it’s brilliant), occasionally connect to a secure server at work, punch a hole through a local firewall administrated by somebody else, etc… That will take a few tunnels to set-up. No worries: with ezTunnel SSH it only take minutes and it all sits in one icon in the system tray.

Simply put, a tunnel works this way:

  • Tell it where the SSH server is (this is your home address, probably a static IP from your ISP or a dyndns address).
  • Tell it which computer you want to access on your home network (this is the internal IP, probably 192.168.0… ).
  • Specify the remote port (for remote desktop that’s 3389, for a web server it’s 80, etc…).
  • Choose a local port (that’s your choice, I tend to use ports in the 5000-6000 range).
  • Start the tunnel and connect to “localhost:5000” (if you chose 5000 as the local port).

That’s it, now you can access all your home computers from anywhere completely securely!

Get “ezTunnelSSH” for free here.

Posted in Blogroll, Programming | Tagged: | 8 Comments »

Programming: Updated Teenage Mutant Ninja Puppets

Posted by llemarie on November 11, 2007

I’ve received a few requests to post the full version of Teenage Mutant Ninja Puppets as shown in the YouTube video I posted a few months ago.

This version has the high resolution textures and character position editor enabled.

Update: Network support now works and the editor can save the current pose of the ghost (the pale guy) by pressing ‘R’ on the keyboard, then during the game you can use the pose by pressing ‘T’.

Download it free here (5MiB).

Screenshots on flickr.

Posted in Blogroll, Programming, Teenage Mutant Ninja Puppets | Tagged: , | 56 Comments »

Project: Musical Caps-Lock Key

Posted by llemarie on November 7, 2007

I posted my first Instructables after I received a comment on my Frankenphones post saying that I should have pusblished the instructions for the headphones.

For this project I took the idea from a Kipkay video and wired a greeting card musical module to the caps-lock key of a colleague’s keyboard, unbeknownst to him, and waited for him to press caps-lock by mistake. Music!

He googled for a virus that plays music on your keyboard, looked for accessibility settings, searched for the source of the Jingle Bells music: is it the PC? is it the monitor? no, it’s the keyboard! This prank is hilarious!

Read all about it on Instructables.

Photos on flickr.

Lire en français.

Posted in Blogroll, Musical CapsLock Key, Prank, Projects | Tagged: | Leave a Comment »